Tailwindcss
Tailwindcss is a utility-first CSS framework packed with classes that can be composed to build any design, directly in your markup.
Enabling Tailwindcss
Add the following Tailwindcss directives to a css file.
@tailwind base;
@tailwind components;
@tailwind utilities;
Select the css file in Prepros then enable Process Automatically and Process with Tailwindcss options on the file options sidebar.
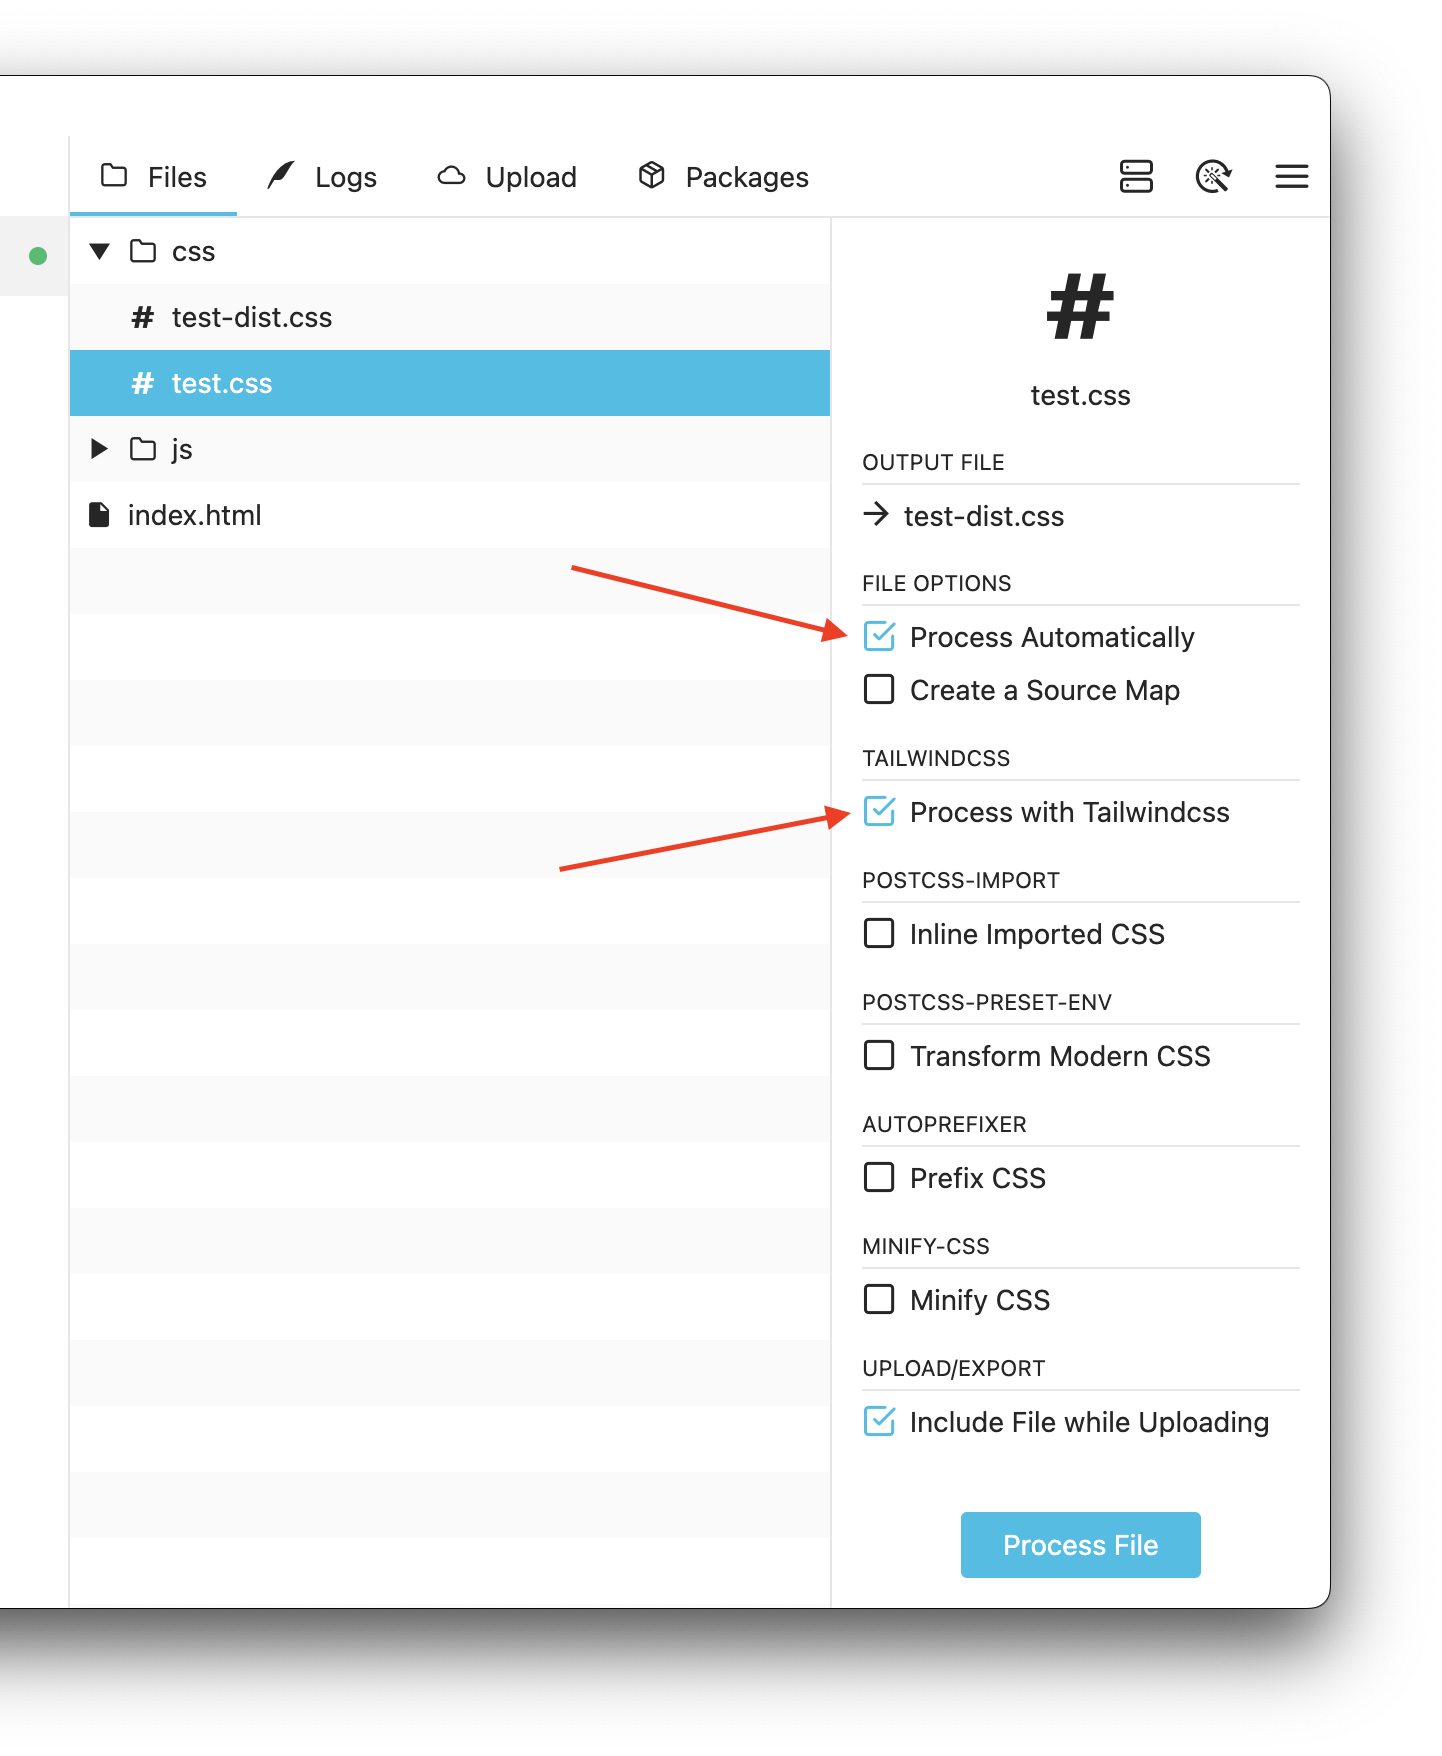
Prepros will now process your css file whenever you make changes to the css file or any html, php and javascript file containing Tailwindcss classes.
Content Configuration
Tailwindcss works by scanning all of your html, php, javascript components, and any other template files for class names, then generating all of the corresponding css for those styles. In order for Tailwindcss to generate all of the css you need, it needs to know about every single file in your project that contains any Tailwindcss class names.
Prepros by default scans all html, php and javascript files except for those stored in library folders such as node_modules and wp-admin to look for Tailwindcss class names.
If you have any other files containing Tailwindcss classes you can reference them from Project Settings -> CSS Tools -> Tailwindcss.
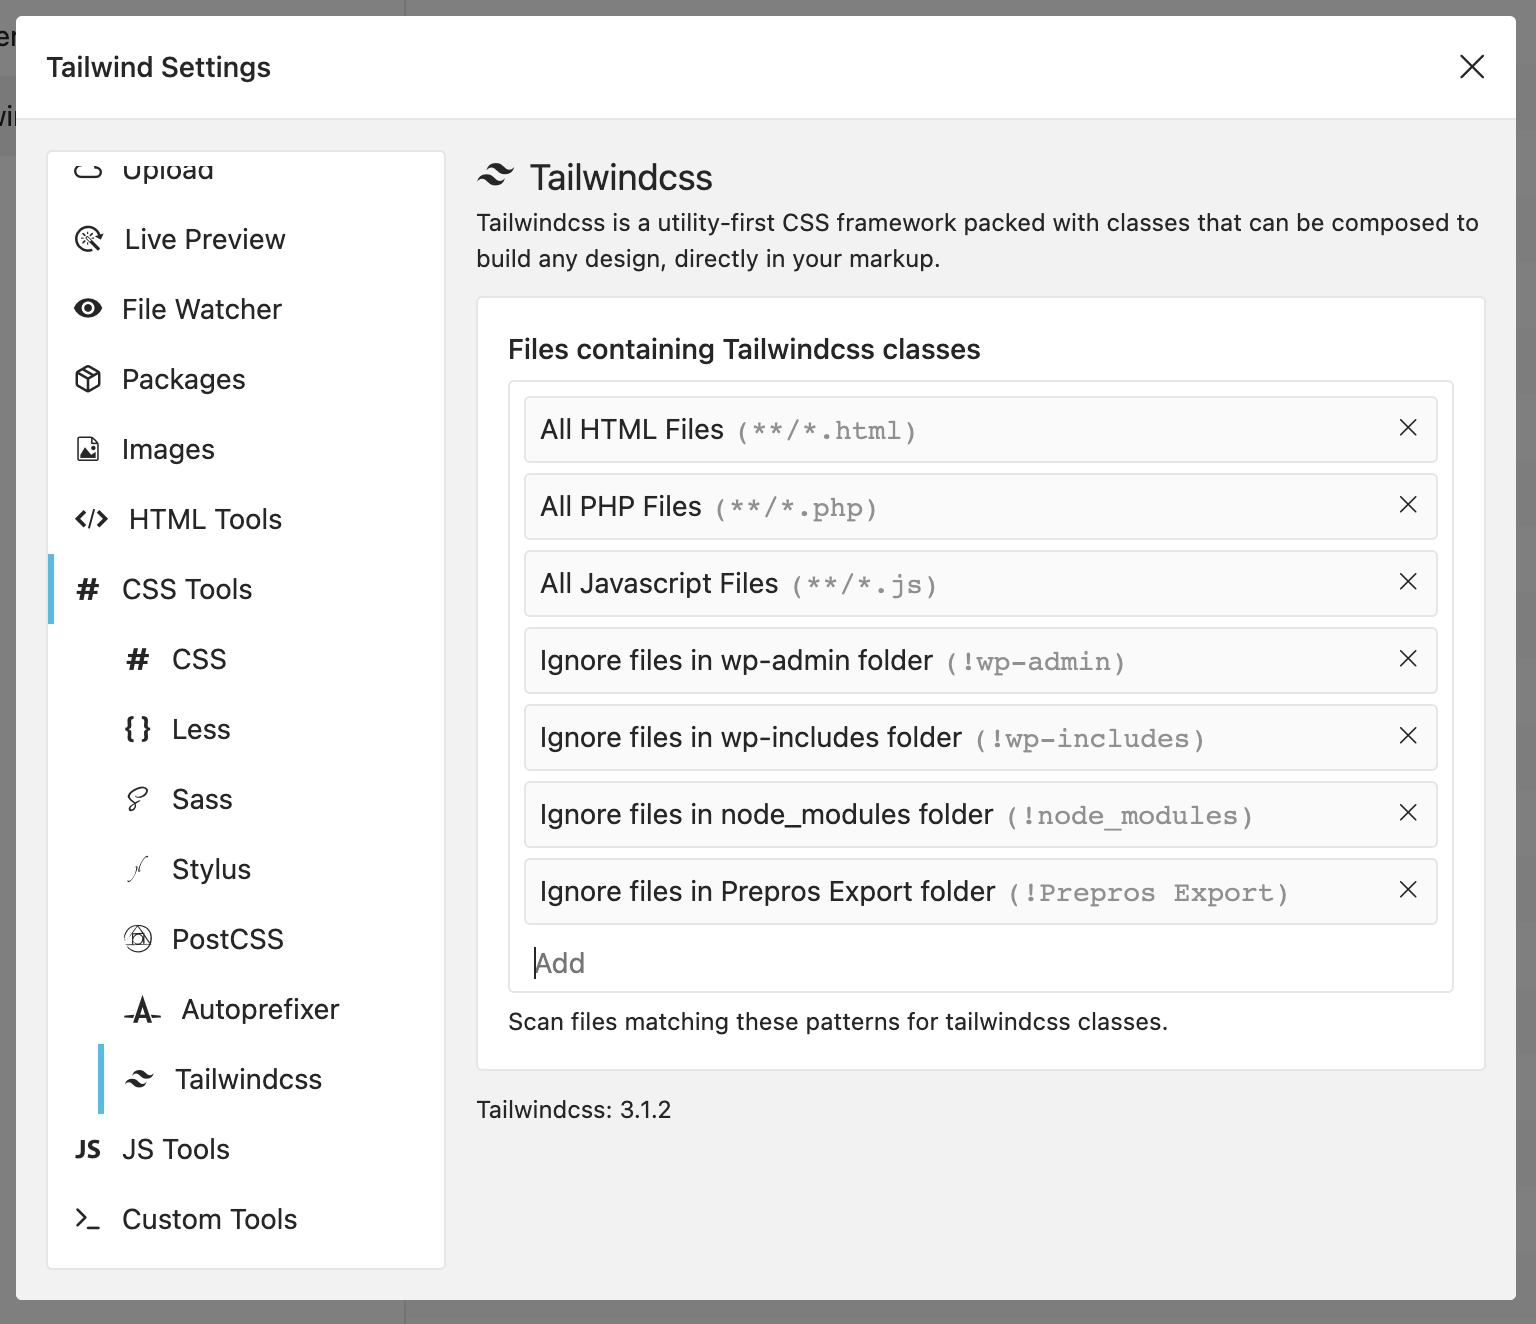
Content configuration accepts paths to files and glob patterns such as **/*.html, **/*.php etc. You can learn more about content configuration from Tailwindcss docs.
Using custom Tailwind.config.js file
If you want to customize Tailwindcss configuration further, you can create a tailwind.config.js file at the root of your project folder. Prepros picks up the file automatically then uses the configuration while processing Tailwindcss files.
Using custom plugins
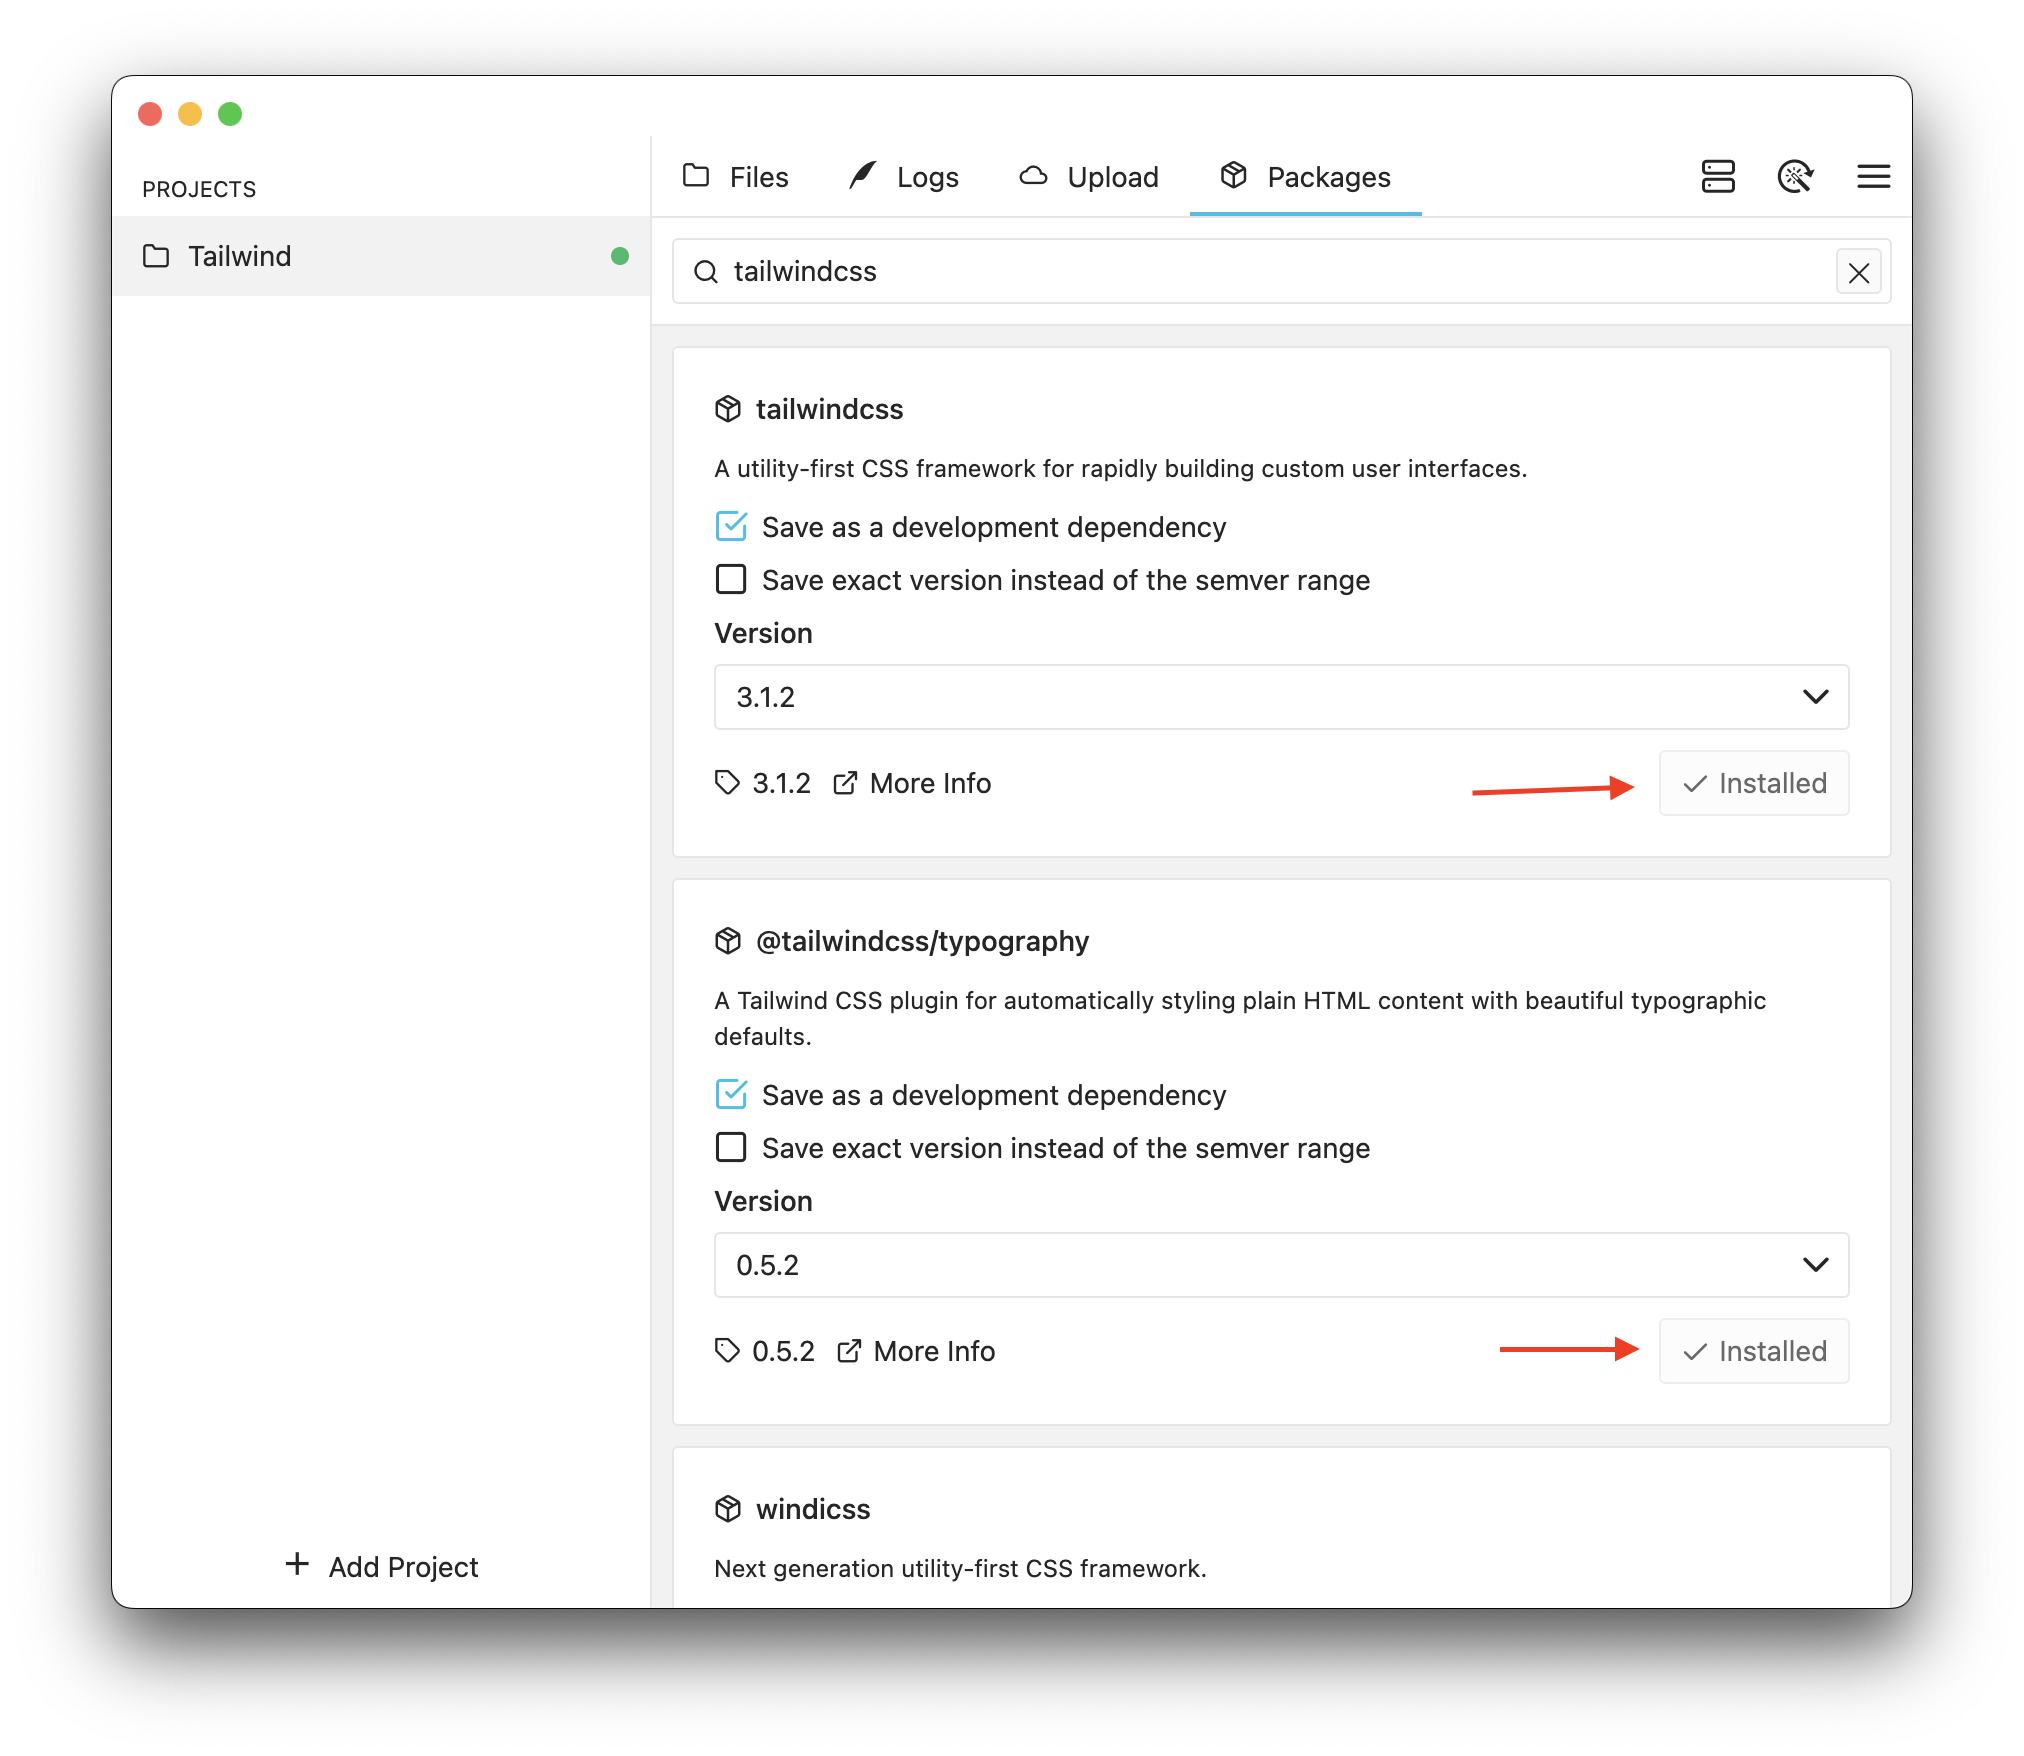
Go to Packages tab in Prepros window then install Tailwindcss and desired plugins.
Now create a tailwind.config.js file at the root of your project folder.
module.exports = {
  content: [
    '**/*.html',
    '**/*.php',
    '**/*.js',
    '!wp-admin',
    '!wp-includes',
    '!node_modules',
    '!Prepros Export'
  ],
  plugins: [require('@tailwindcss/typography')]
};
That’s it. You’ve now got custom Tailwindcss plugins and all the features they enable.